DeepLabCut Tutorial
Contents
DeepLabCut Tutorial
How to get started
Installation of Anaconda and DeepLabCut environment
Start DeepLabCut either through the GUI or Jupyter Notebook
Take a minute to describe your dataset and research ideas
Manage your behavioral video data, e.g., split into trials
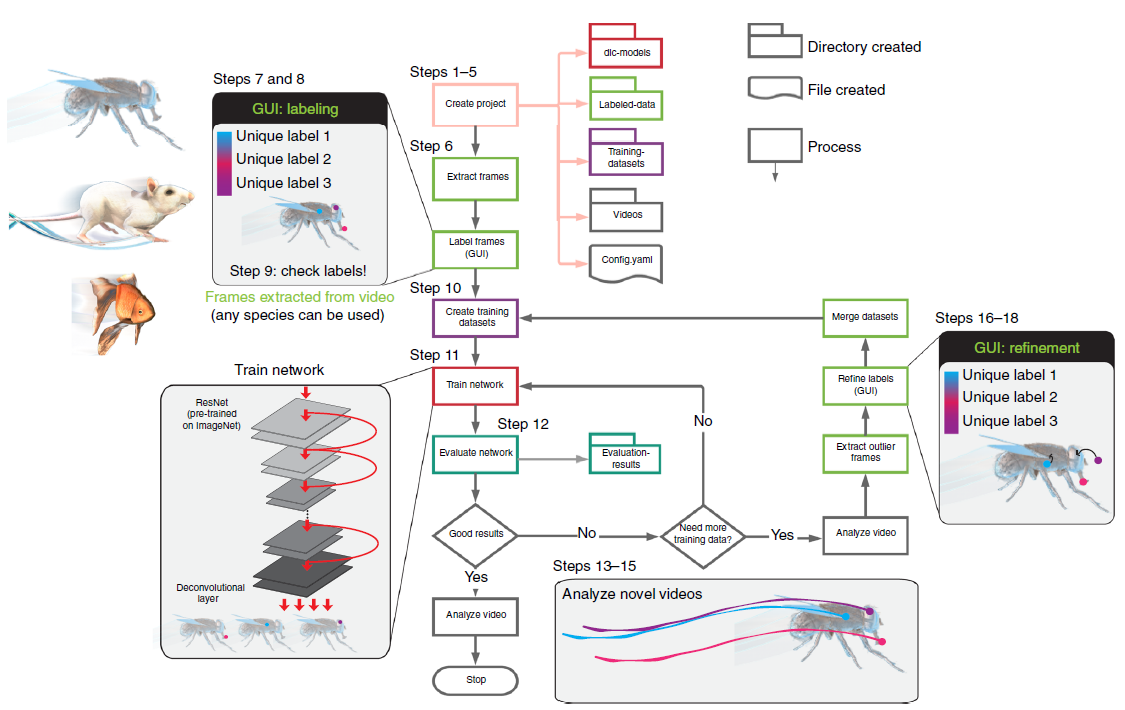
Create a new Project and load your behavioral video data
Define labeling markers and skeleton on your config.yaml file
Extract, label and check frames, before creating a training dataset
Train your model using a GPU
Analyze your data and create labeled videos
Starting DeepLabCut with Jupyter
Open Anaconda Prompt
conda activate DEEPLABCUT (environment)
jupyter notebook / jupyter lab / ipython
import deeplabcut
Downloading Jupyter Notebooks
On the next page you will find a DeepLabCut Notebook, a jupyter notebook I prepared containing the most important steps needed to start your own project.
Download the notebook as .ipynb file
Rename the file and move it to your working directory
Open the notebook with jupyter lab or notebook
Start taking notes and make the notebook yours
Troubleshooting
Student contribution
The following tips and tricks were put together with the help of students during real troubleshooting in course exercises. Thank you for your contributions!
How do I get help?
Check out the known issues reported on GitHub using keywords from your error messages.
Read the GitHub Documentation for best practices on how to open new issues.
Go through the tips and tricks sections in the Documentation to find any errors in your procedure or code.